IJC tutorial: Using Import, map & merge
Overview
This tutorial will introduce you to using the more advanced features of the IJC import functionality and explain the different use of the map and merge functions available in that dialog. The map function allows you to map source data items from an input file to new or existing fields in an entity. As such, map's general purpose is to place data correctly in either new or existing fields for new rows of data.
The first example in this tutorial shows the simple addition of a commercial SDF file to a structures table with two default 'TLA' fields that are to be added in addition, 'supplier' and 'library'. This initial root node entity is a structures table of molecules with CD_ID as primary key. The second example shows us how to process a second SDF file into the same Structures entity and will show the use of the map function to ensure the second data set is mapped to suitable existing fields in the entity. The second file will be from the same supplier but is a different library. Finally we suggest how more files can be added and how this example might become a full commercial supplier build approach. Commercial files for this example can be found here: Asinex .
In the second example of this tutorial, we will use some of the PubChem data set to demonstrate the merge functionality. The PubChem data set consists of a number of molecules delivered as SDF files and identified using a primary key value. In this example we will obtain our SDF files directly from this source: PubChem SDF. In addition a set of Biological data items are available in CSV format that can be merged using that primary key and a 1:1 mapping to it's foreign key. In this example we will obtain our CSV files directly from this source: PubChem CSV. This is a very good example to show, as there are several unexpected hurdles to overcome within the data that require an understanding of map and merge! Also we will eventually see that this example is well suited to a scripting approach due to the number of files involved.
We also use the local derby database for the purposes of demonstration, the Oracle / MySQL approaches are essentially similar using the Instant JChem interface.
Contents
Create Project & Schema connection
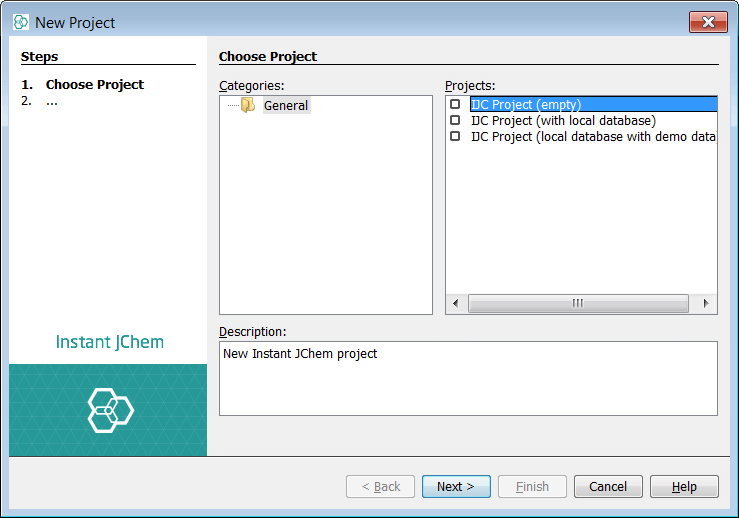
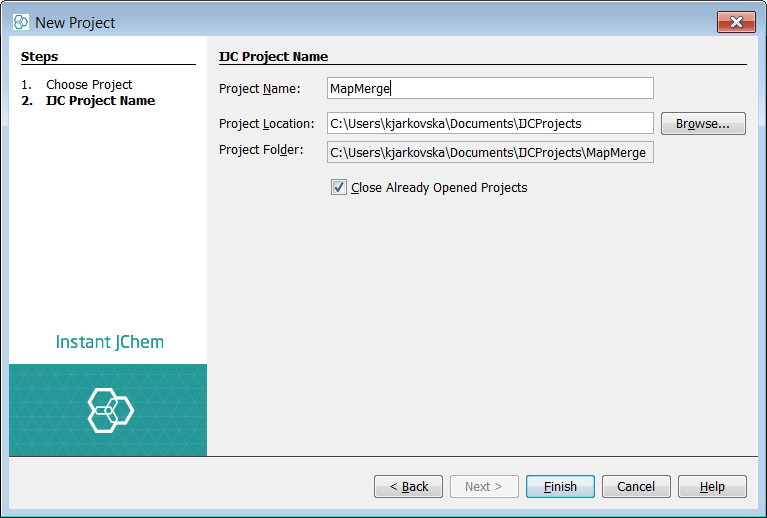
First create a new project container. Use File -> New Project... menu entry or appropriate icon in the toolbar (shortcut - Ctrl+Shift+N). Create a new project and choose IJC Project (empty). Next name your project and select finish. Next, right click in the project window and select new schema, choose Embedded Derby for this example and finally name your schema.
Create a new structures Data tree in the schema
Next we should need to create a data tree with a structures table and there are two approaches to this. You can either Right click on the schema node and a menu will appear. Then select New Data Tree and structure entity (table)...
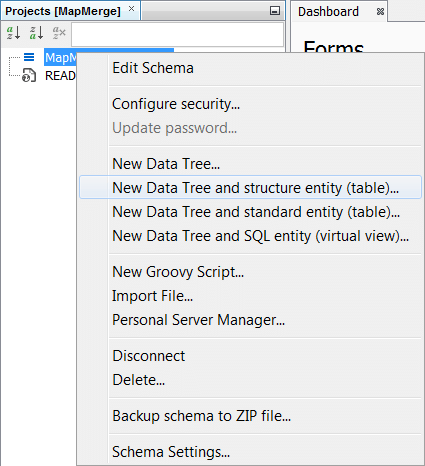
Alternatively, you could complete the same result with operations in the schema editor with the same result. Create a structures entity in the entities tab by right clicking New Structure entity (table)... . Then at the data tree level, promote it using New Data tree from entity ... Additionally, you can create the entity directly at the data tree level by selecting New Data Tree and structure entity (table)...
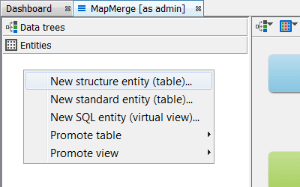
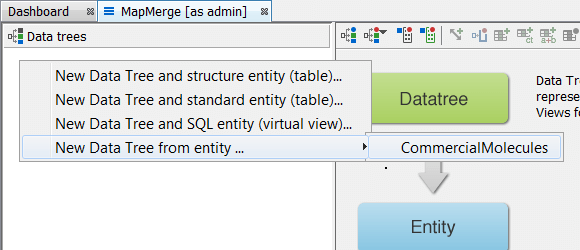
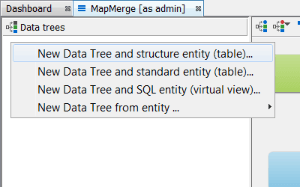
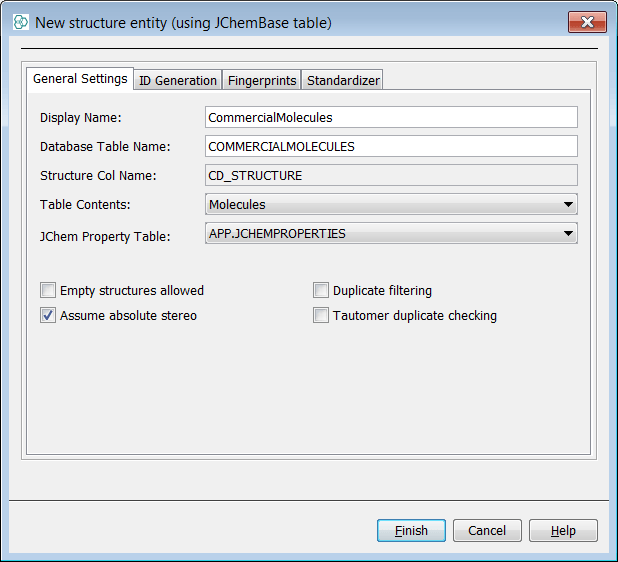
Using the preferred method, create a data tree with a root node named "CommercialMolecules". In this example notice we have deliberately left the duplicates tick box off and so we will allow duplicate structures in this entity.
Add the default fields 'Supplier' and 'Library'
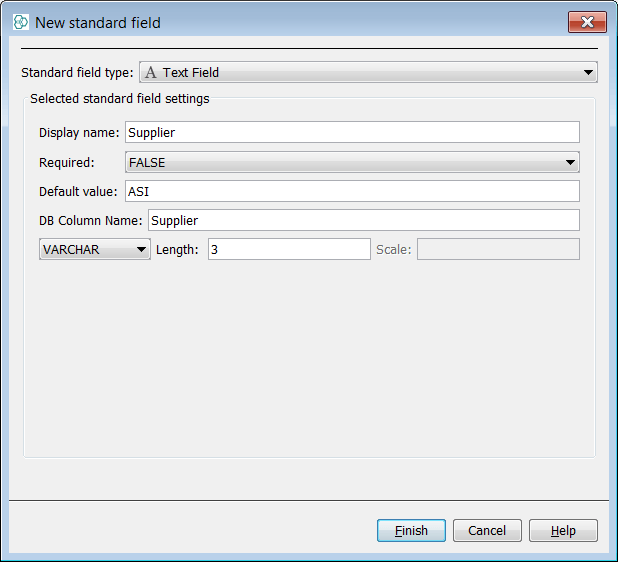
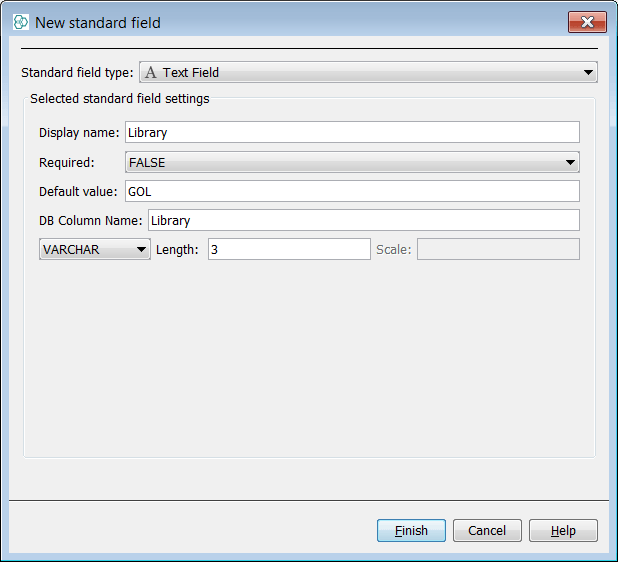
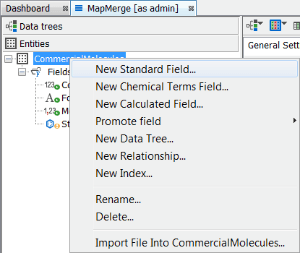
You now have a 'vanilla' structures table. Next right click on the data tree and select Edit data tree and you will open the schema editor. At the entities level right click on the entity and select New standard field . Select a text field, name the new field 'Supplier', set the default value to 'ASI' and the field size to 3. At the entities level right click on the entity and select New standard field . Select a text field, name the new field to 'library', set the default value to 'GOL' and the field size to 3. You can also set default values at import time which you can see below. Now we will import the first commercial supplier SDF library 'Asinex Gold'.
Import the first commercial supplier file and map some new fields
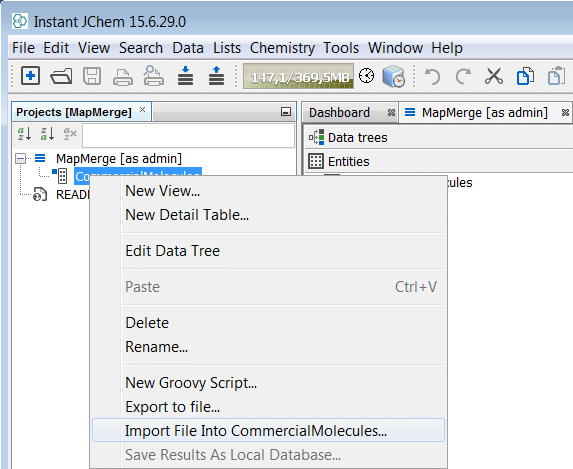
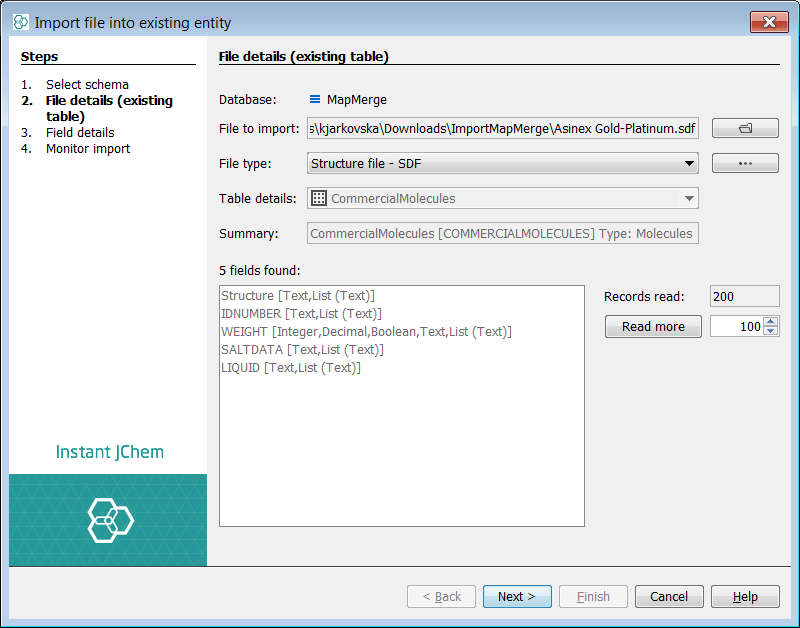
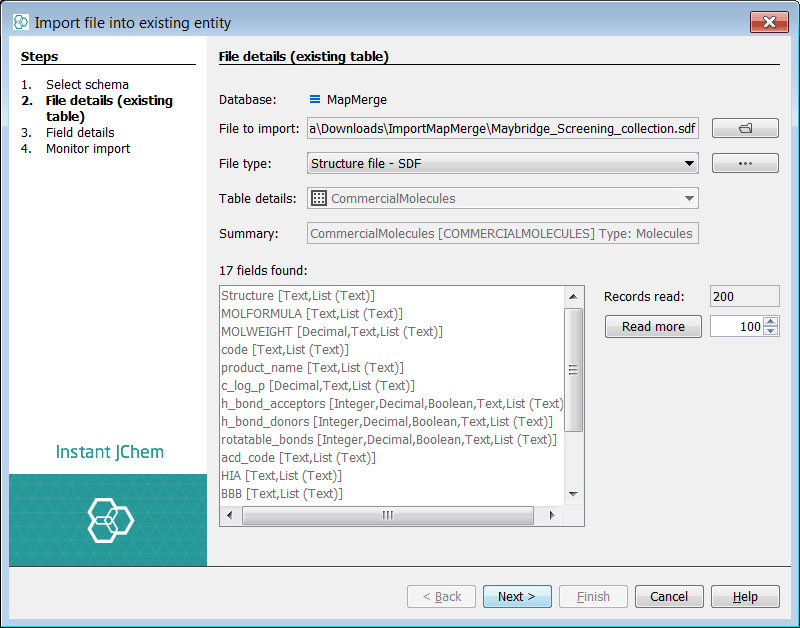
Next, we will complete a simple import and map some new fields found in the first input SDF file 'Asinex Gold-Platinum'. Right click on the root node and select Import File Into X.. . and select the file to import. The first dialog lists the potential fields found in the source SDF file. Press the 'Read more' button in order to examine later records in the file for more fields to add. Once satisfied, select next and the next dialog appears.
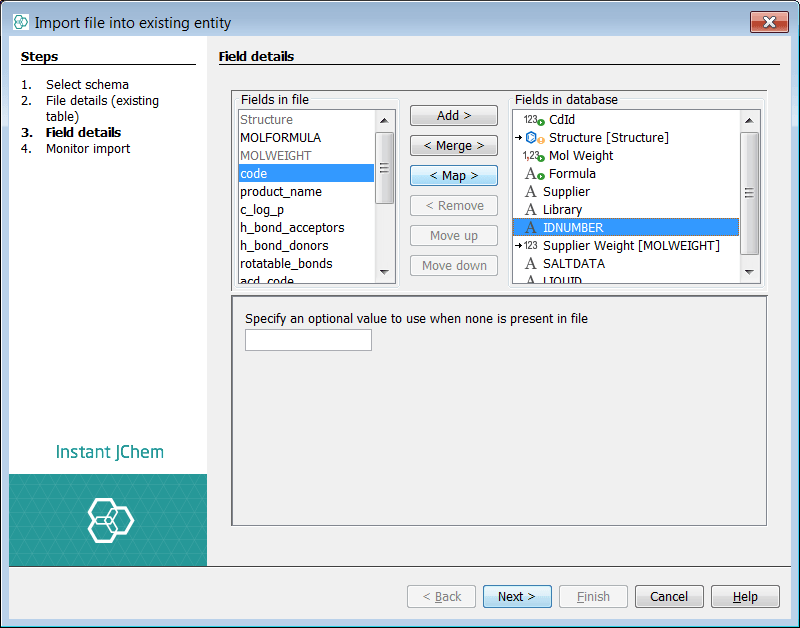
You can now see two lists of fields. The left list shows the potential fields from the source file. The right list shows the current and potential structure of the target entity. The Structure (ctab) from the file is automatically mapped to the structure column of the entity. The auto populated fields (green arrow) are visible and cannot be mapped to, if you select one no options are available. The two additional existing fields added above, are visible with no mapping. At this stage you can also specify a default value for these fields. For the purposes of demonstration we will set values here also. IJC has suggested 3 new fields to add, indicated by the sign.
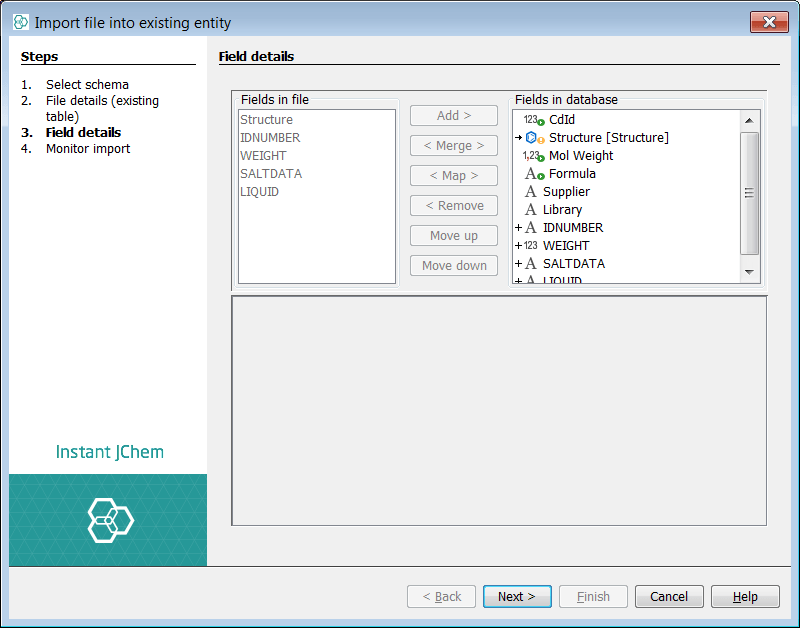
If you select any of these potential fields, you can choose to remove the field, or move up and down the fields or rename the field. In this case we will rename the weight field to be 'Supplier Weight' to indicate source.
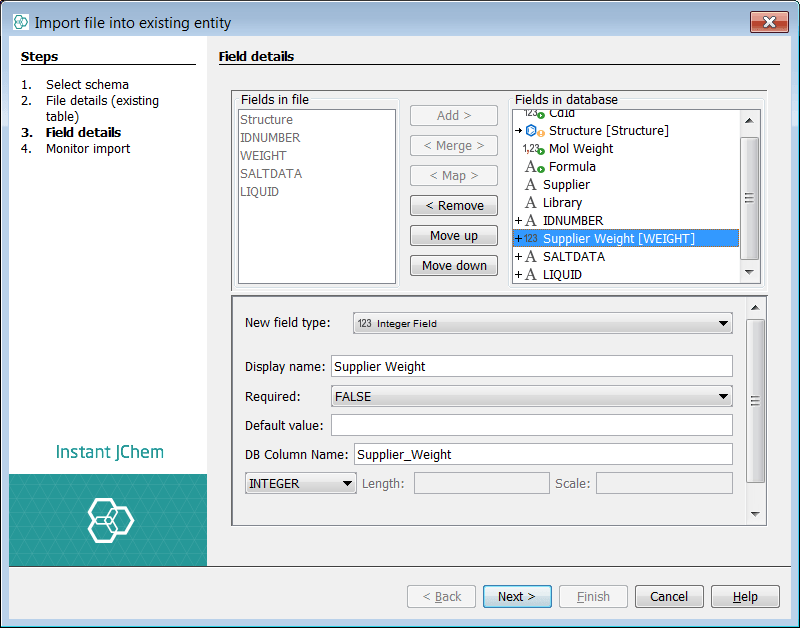
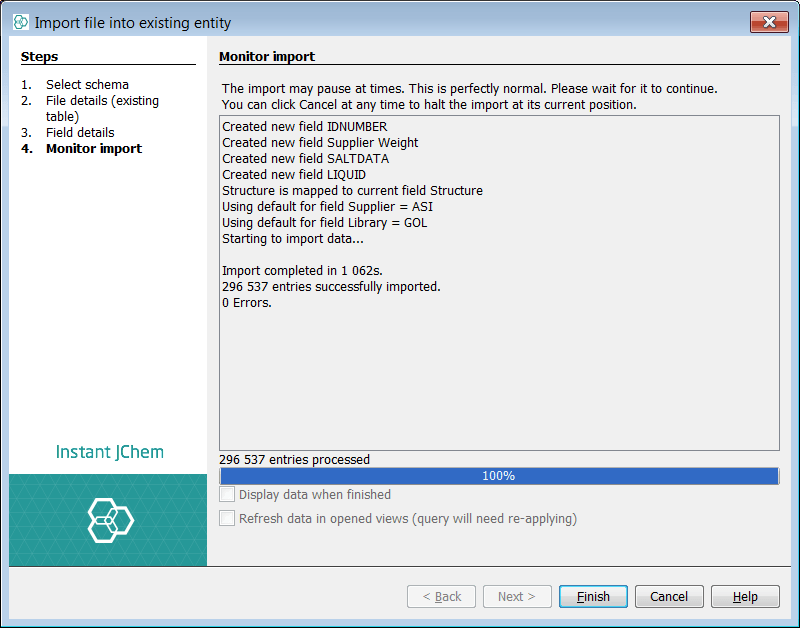
Select next and the import will commence. Once complete select finish. You can see that Instant JChem has imported ~300K records in a matter of minutes.
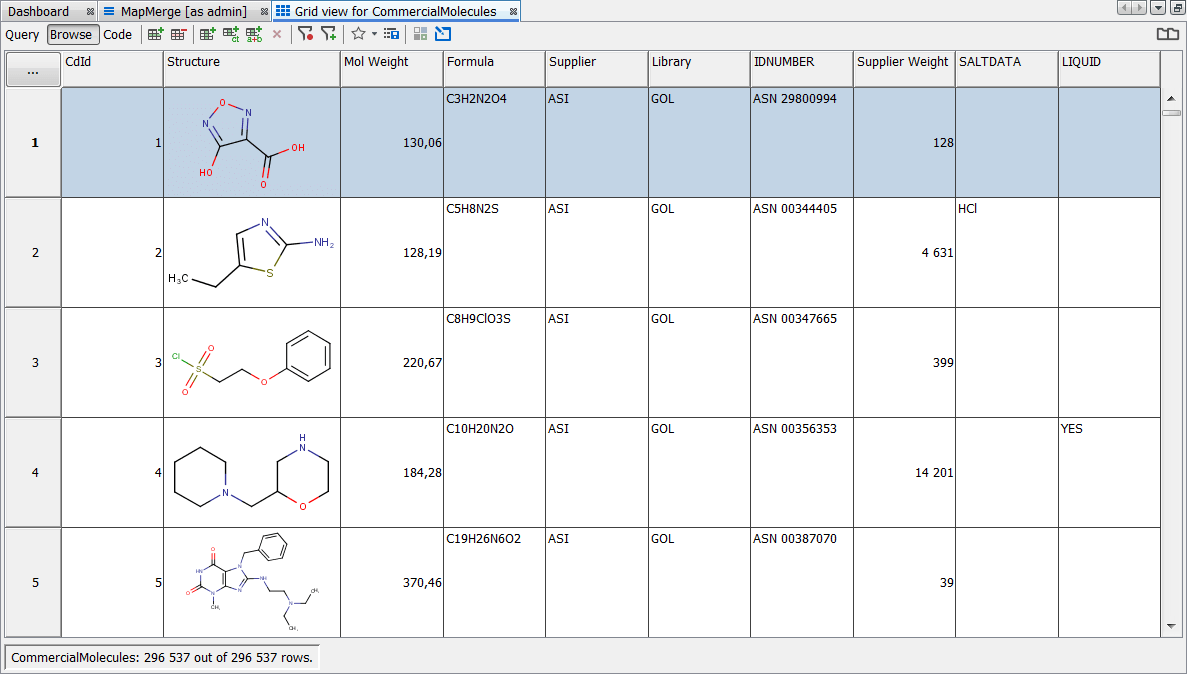
Finally, you can check your import by opening the grid view for the data tree and examining the data.
Modify the default value for library & import the second commercial supplier file and map to existing fields
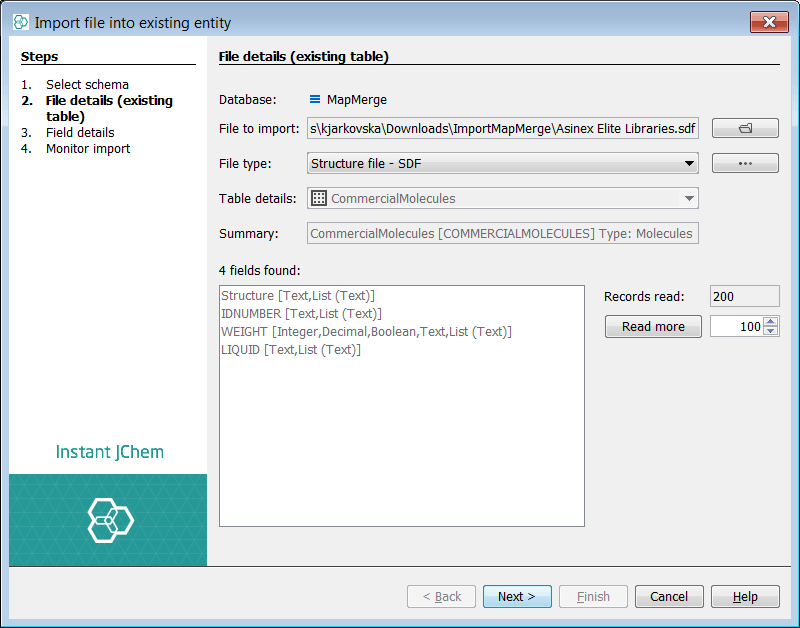
Next we can process the next SDF file, 'Asinex Elite'. Right click on the root node and select Import File Into X.. . and select the file to import.
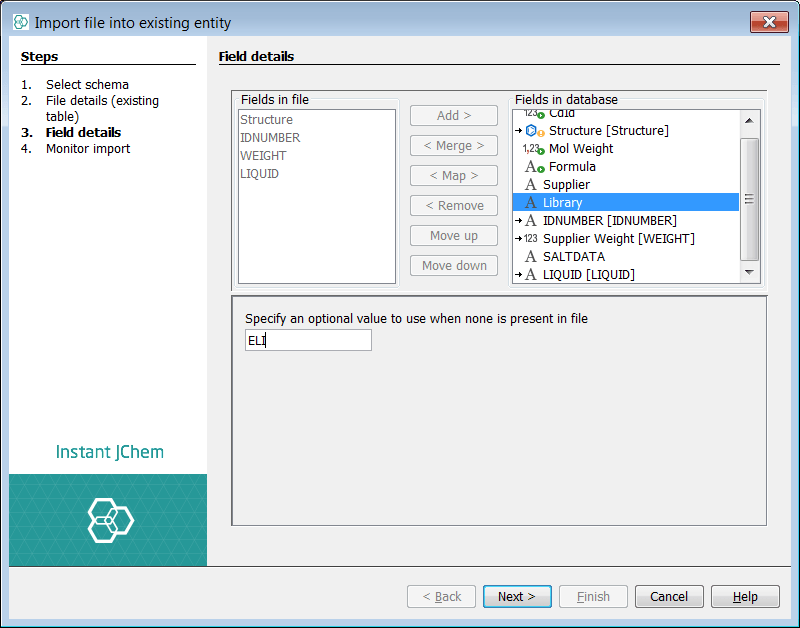
In the next dialog, we can select the 'library' field and set the default value to be 'ELI' in line with the new file.
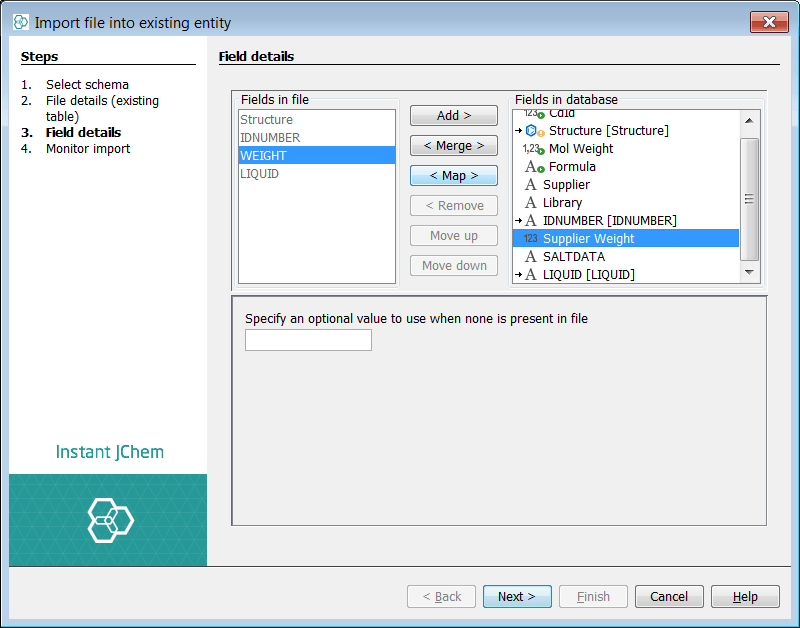
We can also see that IJC has suggested adding a new field called 'weight'. Previously we made this source data item into the field 'supplier weight' so in fact we do not want to add 'weight', but do want to map 'weight' to 'supplier weight'. In order to achieve this select 'weight' and remove it. You will notice on the left list 'weight' is no longer greyed out which means it is available to map.
In order to map, select both the source 'weight' and the target 'supplier weight' and you can see the map button activated. Select map and the mapping will be set and is indicated by an ->. This is similar to the Structures, 'IDNUMBER' or 'SALTDATA' which were mapped automatically based on field name. Select next and the import will commence.
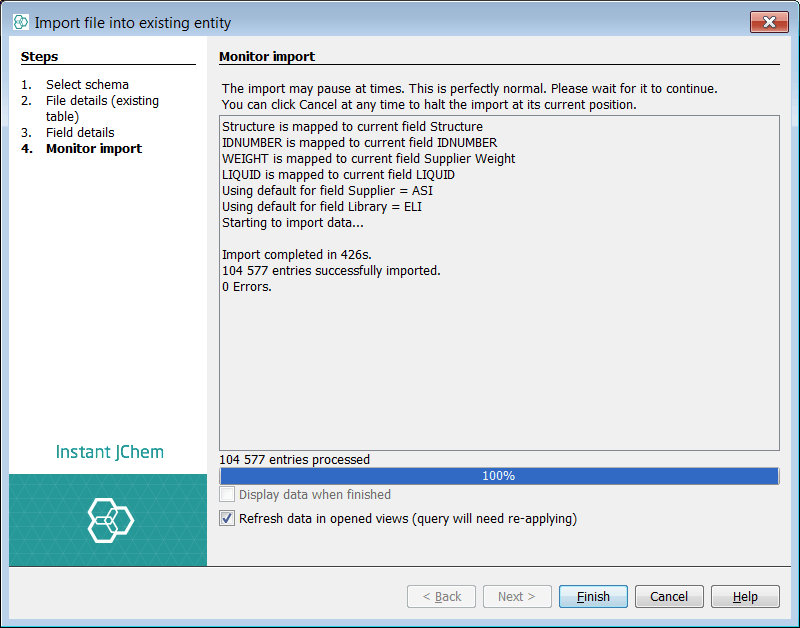
Once complete select finish. You can see that Instant JChem has imported ~100K records in a matter of minutes.
You can now search your Asinex set based on library ('GOL,'PLA') as well as other parameters. Of course, you can use this as this basic import & mapping process to build a larger, commercial supplier set using many other supplier SDF files and libraries available and we leave you to enjoy completion of this now you know how with Instant JChem!
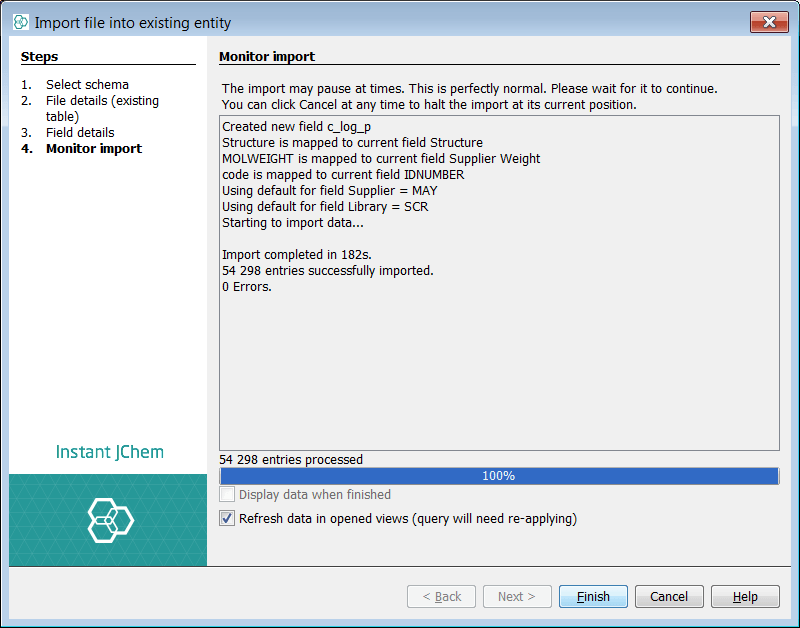
The screenshots below is for the next step which might be adding the Maybridge data set. For this we show mapping 'code' to 'IDNUMBER' and hence using the field 'IDNUMBER' as the Supplier Identifier, and 'MOLWEIGHT' to 'Supplier weight'. We also add a new field c_log_p from this source and set the supplier default values to 'MAY' and library default value to 'SCR'.
{success} Tip:
With such an import process in place, it is possible to extract and create a set of unique molecules based on commercialmolecules contents using the SQL language. Why do this? You then can search this smaller unique table and recreate/refresh it based on the non-unique and evolving contents of commercialmolecules. A bespoke primary key generation method could be implemented using triggers, on this new 'parent' table based on a SQL statement like
CREATE TABLE UniqueMolecules as SELECT DISTINCT cd_smiles,... FROM CommercialMoleculesThis standard table is then indexable (CD_SMILES) and a foreign key field could be added and updated (using for example, unique smiles handle) on commercialmolecules to yield a relational model of two tables, that are then joinable and hence a simple relational form can be built upon the data model: UniqueMolecules -< CommercialMolecules, giving effectively a commercial supplier build. The new cartridge based views are also ideal for this and can be created using similar SQL, based upon commercialmolecules and then promoted to a standard + cartridge index entity.
Merge using the PubChem data set
First create a new project container. Use File -> New Project... menu entry or appropriate icon in the toolbar (shortcut - Ctrl+Shift+N). Create a new project and choose IJC Project (empty). Next name your project and select finish. Next, right click in the project window and select new schema, choose Embedded Derby for this example and finally name your schema. Using the preferred method, create a data tree with a root node named "PubChem_01ConfPerCmpd". In this example notice we have chosen duplicate filtering ticked on so we will not allow duplicate structures in this entity.
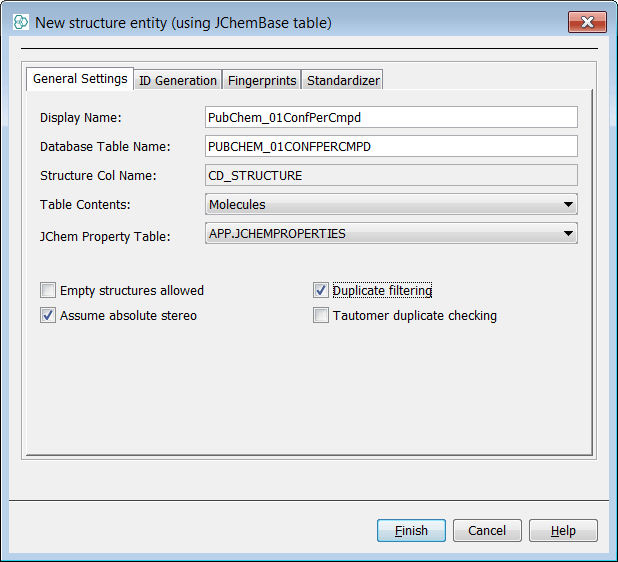
In the project explorer window, right click on the new entity named "PubChem_01ConfPerCmpd" and select Import File Into X.. .. Select the first of the SDF files you have downloaded and unzipped and then select next. You can see a new dialog now that lists source fields and potential new fields in your target entity. For now we will accept all as new fields and create all new suggested fields that available in the source SDF. Once complete, select Finish .
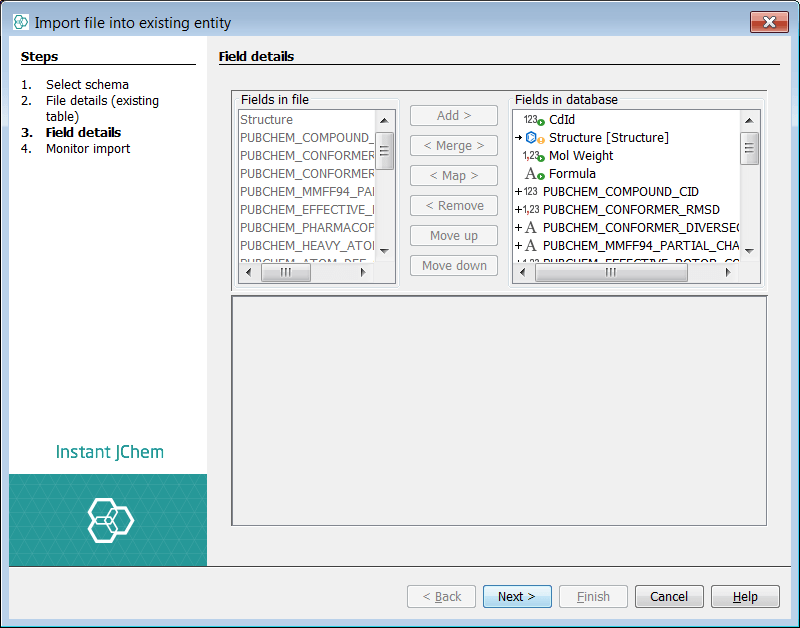
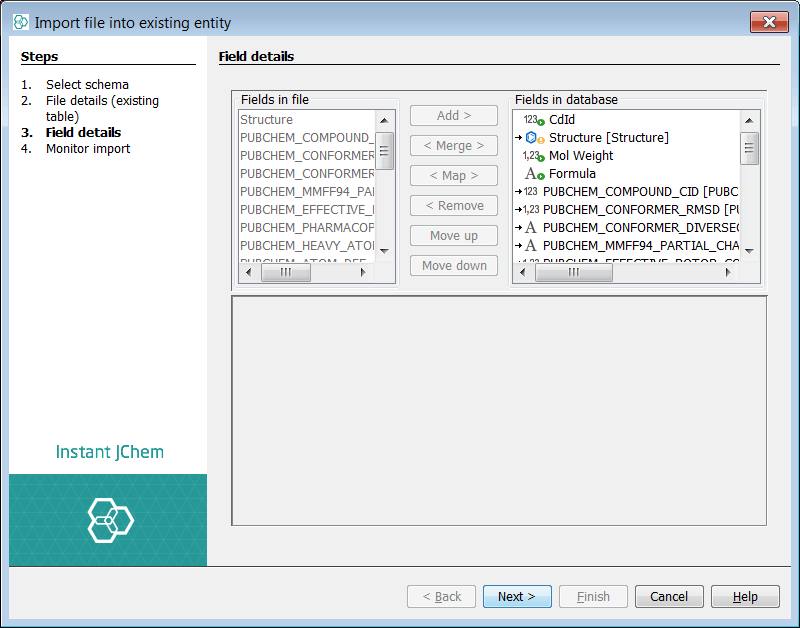
Next we will add another of the PubChem SDF file. We assume each file has the same fields and so on addition of this second file we will expect they will all be automapped to the fields created previously in the first import iteration. This is possible because all the fields are named in an orderly fashion. In the project explorer window, right click on the new entity named "PubChem_01ConfPerCmpd" and select Import File Into X.. .. Select the second of the SDF files you have downloaded and unzipped and then select Next . You can now see the automapping in action (->) and all you need to do is select next and once completed finish. There are many SDF files provided from this PubChem source and clearly it would be useful to process these in one go as a batch job written in the Groovy scripting language available in IJC rather than process each one sequentially.
We now imagine a scenario where some or all of the available SDF files have been loaded into out root structures entity "PubChem_01ConfPerCmpd". The primary key for the structure data is contained in the field named "PUBCHEM_COMPOUND_CID". Since we would like to merge biological information from the PubChem CSV files into this same entity we should need to complete this merge based on this primary key field. Also, importantly in order for the merge to perform efficiently it is highly advised to place a unique index on this field prior to merge. Fortunately we can do this directly in IJC as follows.
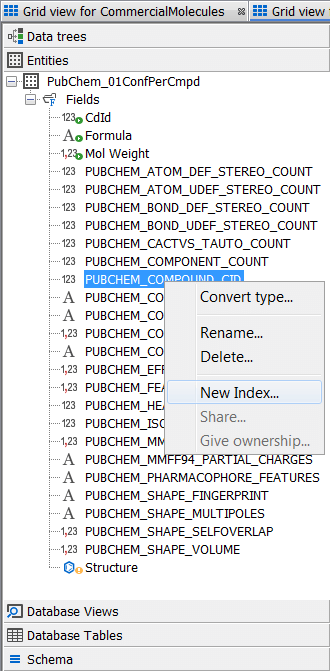
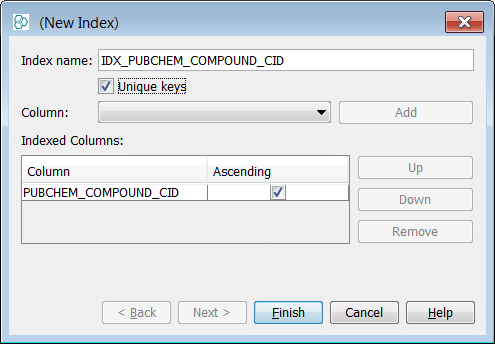
Right click on the schema node and select Edit schema and the schema editor will open. At the entity level expand the description of the entity "PubChem_01ConfPerCmpd" and right click on the field "PUBCHEM_COMPOUND_CID" and select New Index . Rename your index if you wish and ensure the unique keys tick box is checked on - select Finish .
As an alternative to a merge operation here, it is also reasonable to create a child enity and load the CSV data into this separately and then create a 1:1 relationship and relational form. We will create a separate entity so as to examine the contents of the CSV files but since we wish to show merge operations that's what we will do! Next we should need to create a data tree with a standard table and there are two approaches to this. Right click on the schema node and select New Data Tree and standard entity (table)... . Name the new enity "PubChem_BioActivity". In the project explorer window, right click on the new entity named "PubChem_BioActivity" and select Import File Into X.. .. Select a CSV file from the list and import all fields.
Open up a grid view in your new standard data tree and examine the first few rows. In this example we will retain fields 3, 4 and 5 which are named "PUBCHEM_ACTIVITY_OUTCOME", "PUBCHEM_ACTIVITY_SCORE" and "PUBCHEM_ACTIVITY_URL" and we will merge bases in field 2 "PUBCHEM_CID".

In the project explorer window, right click on the new entity named "PubChem_01ConfPerCmpd" and select Import File Into X.. .. Select the first of the CSV files you have downloaded and unzipped and then select next. First use the remove button to remove all suggested new fields . Next select the fields "PUBCHEM_ACTIVITY_OUTCOME", "PUBCHEM_ACTIVITY_SCORE" and "PUBCHEM_ACTIVITY_URL" and press Add button. Finally select "PUBCHEM_CID" in the source and the merge field "PUBCHEM_COMPOUND_CID" and choose the Merge button. Notice the double headed arrow which indicates a merge mapping. Further note, if you find the merge button is not highlighted it is quite likely you have selected more than one field on each side. Select next and the first merge iteration (with field creation) will commence. If we examine the "PubChem_01ConfPerCmpd" entity we can see three new fields added.
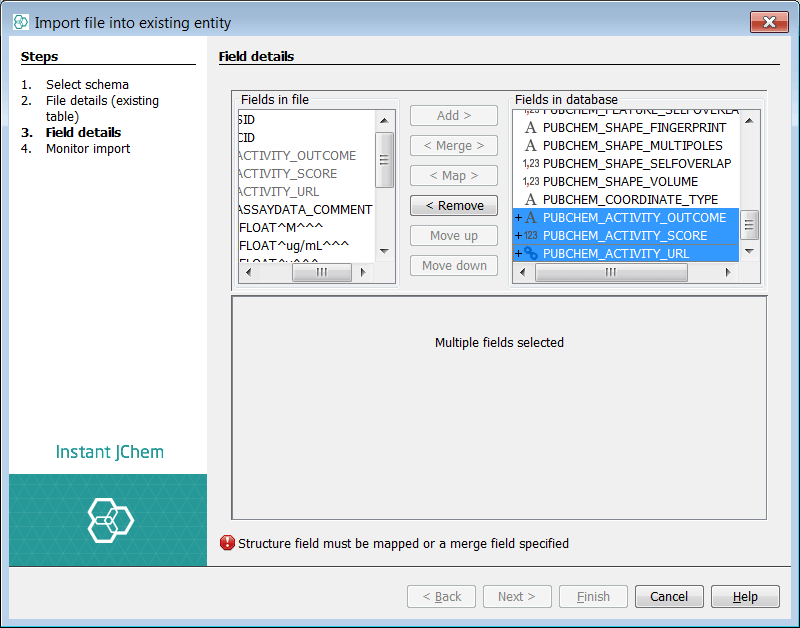
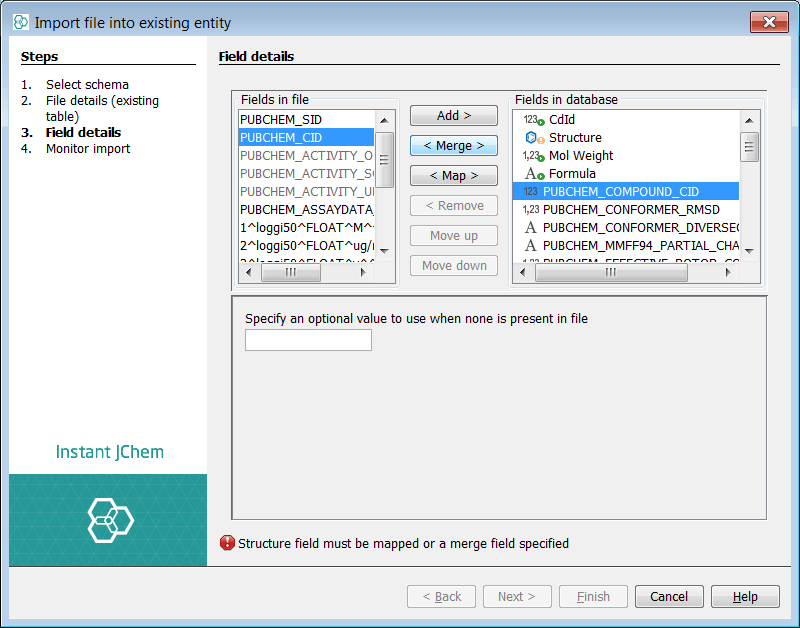
Subsequent processing for the rest of the CSV files are essentially similar. For the purposes of this example, if you see any further new fields then they have not been merged based on the join column, rather they will be added as new rows which should subsequently throw a unique constraint error !
{success} Tip:
You see a double headed arrow (merge) and a single headed arrow -> (map). There are many CSV files provided from this PubChem source and clearly it would be useful to process these in one go as a batch job written in the Groovy scripting language available in IJC rather than process each one sequentially.
Congratulations
Congratulations! You have just completed the following, by learning :
-
How to create project & schema.
-
How to create data tree (Structures) and complete a simple import into it, specifying default fields.
-
How to use map functions to add further SDF files to the structures entity...culminating in a commercial supplier build!
-
How to merge relevant SDF and CSV PubChem data, to an existing entity based on a merge (primary key).
