Plexus connect python scripting
Python Scripting
This documentation will guide you step-by-step through different ways of running Python scripts alongside the Plexus Connect application. Be aware that system requirements might differ depending on the environment setup chosen.
Also, please ensure you follow the Requirements and additional steps outlined in Installation section.
Available Environment setups
In-View Python Scripting Console
For practical examples of In-View Python Scripting Console usage navigate here.
Requirements
- Python Installation on local system. Version 3.7 or higher
- Connect API extension for local Python.
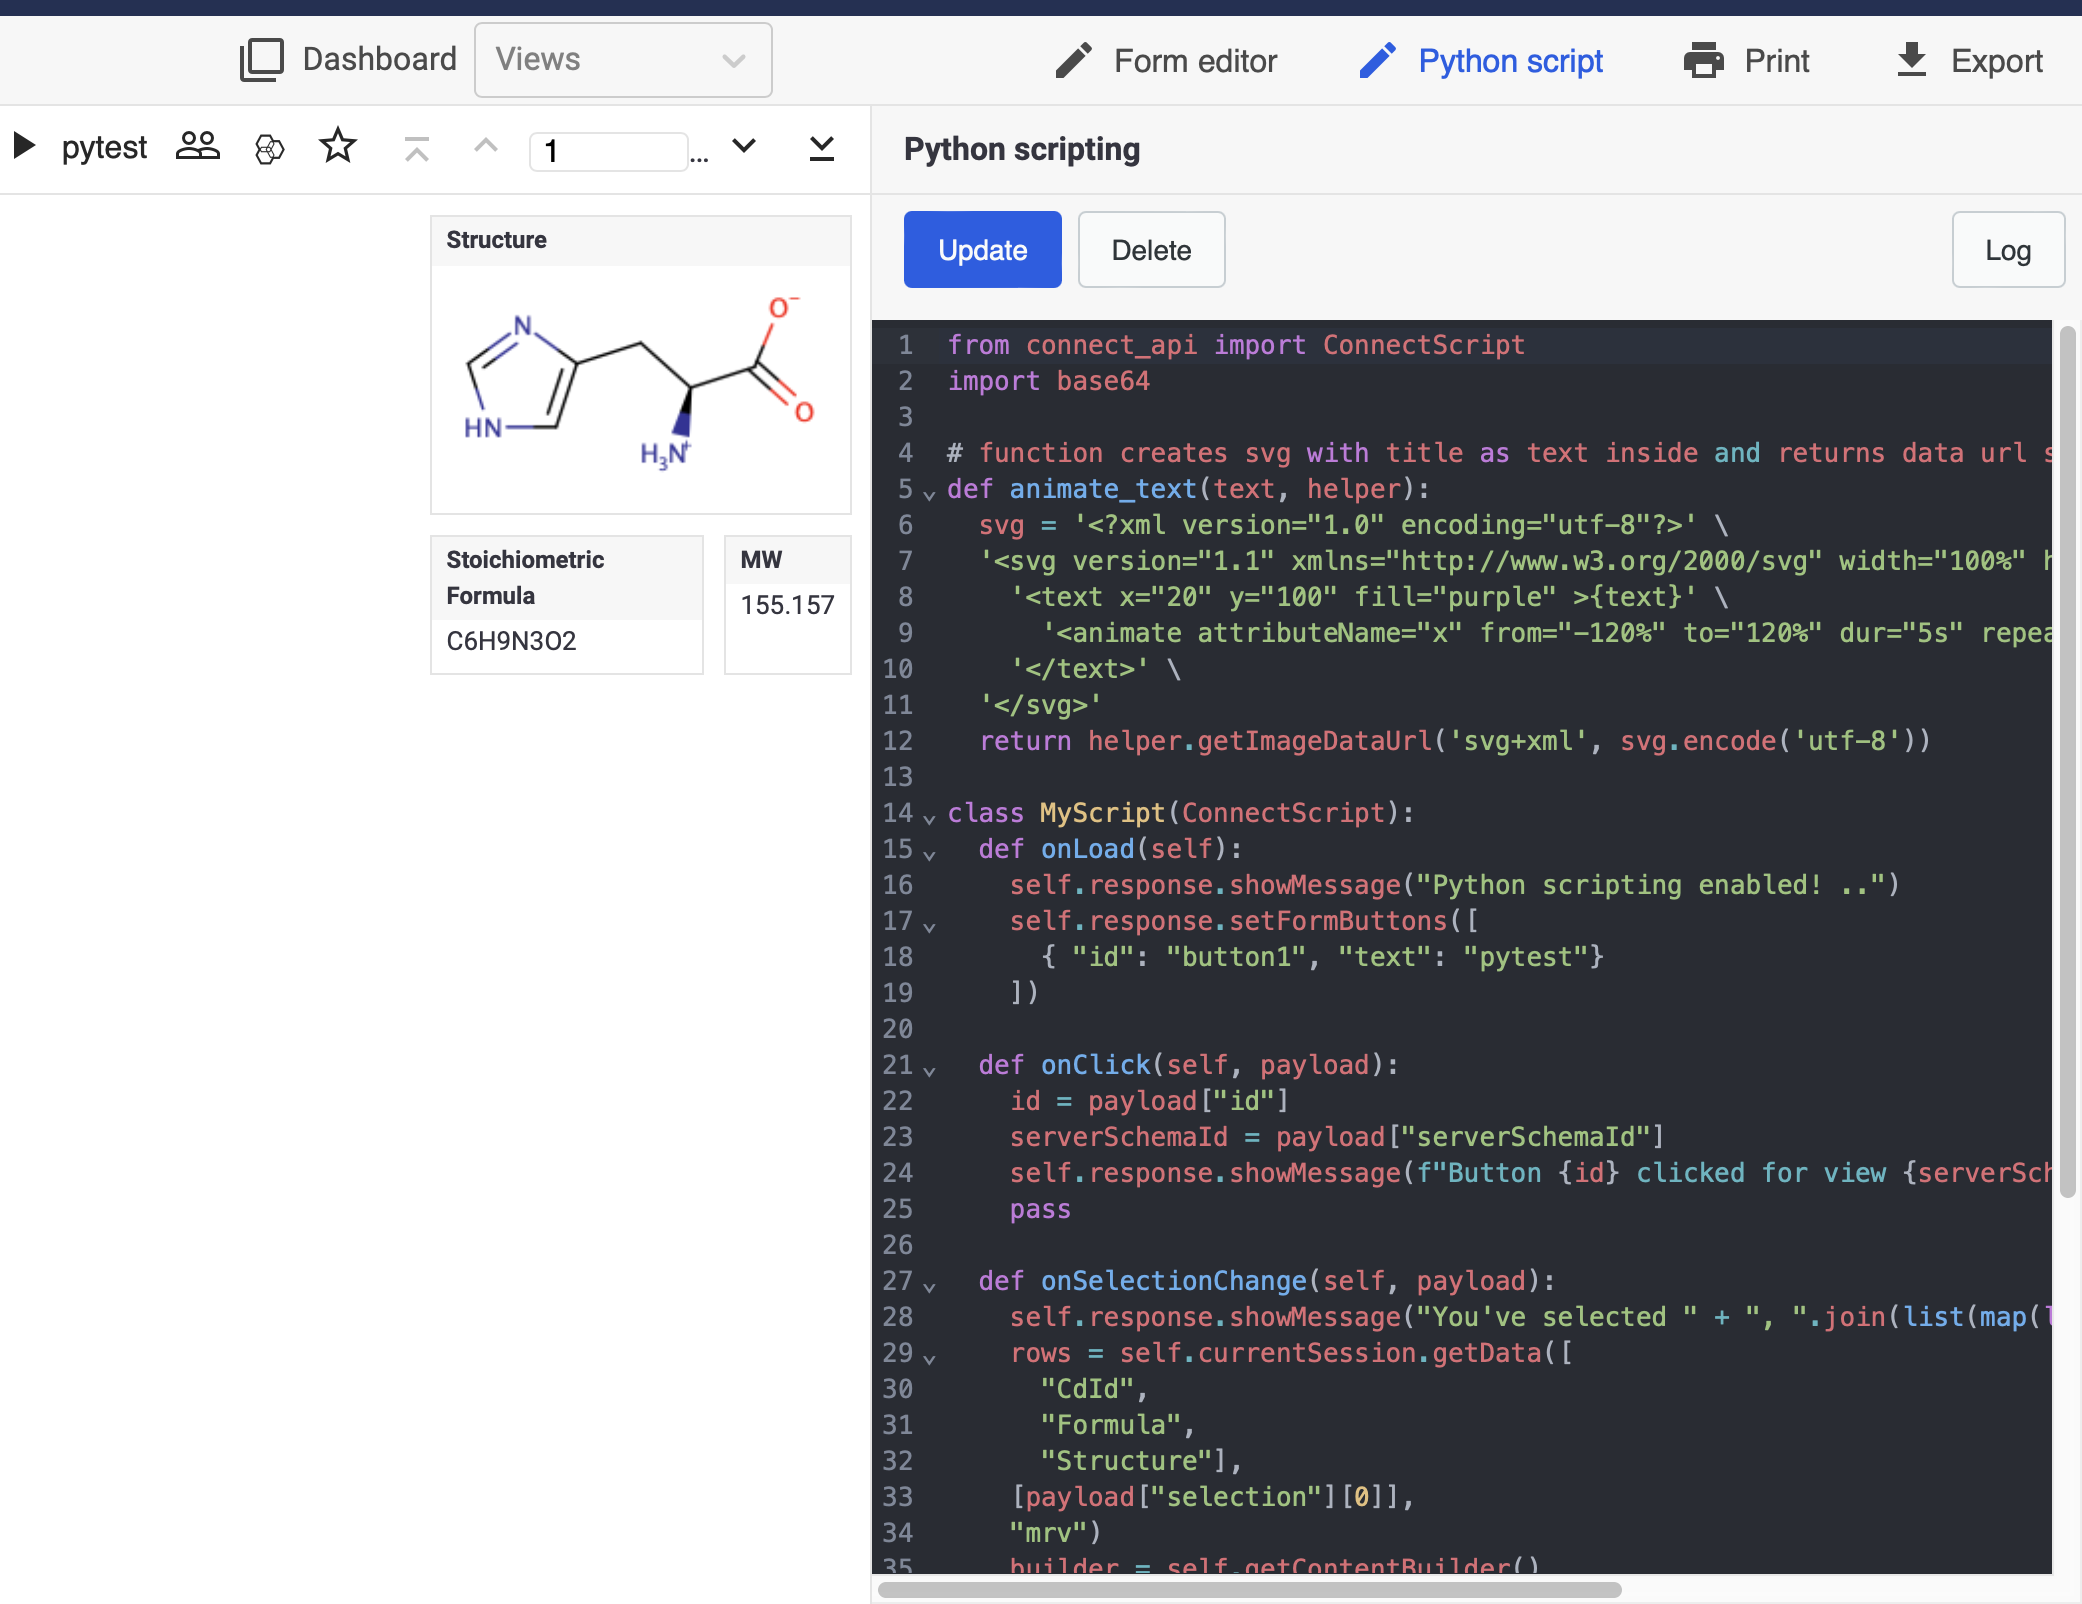
Plexus Connect has built-in Python scripting console ready to be used. Python scripts can be coded and executed directly on the same screen with your dataset, enhancing user experience and making scripting more accessible even to users with only tangential knowledge of Python language. Compared to other environment setups described below, built-in console is the most straightforward as no further specifications (such as view ID) are necessary for the script to run. Python console is always linked to the specific view in which it is opened. Upon opening the console, you will notice a sample script which can serve as a basic skeleton for you own scripts.
More exemplary scripts can be found in Plexus Connect Python Library in Additional Downloadables section here.
Standalone
Requirements
- Python Installation on local system. Version 3.7 or higher
- Connect API extension for local Python
Following basic workflow, when using connect_api in Python script is:
- Create
DataApi - Open
Session - Run query on new
Session - Fetch data for some of the fields
The simple example script below is written for Demo Project Pubchem Grid View :
# Create api : DataApi("apiKey", ["serverSchemaId"]) or DataApi("apiKey", ["serverSchemaId1", "serverSchemaId2"]) for 2 schemas
# warning: we don't recommend storing
# credentials directly in the script,
# but use different means in python how to obtain the password from the user.

api = DataApi("6i9MYZxHxJMvHn4qyJ2vAockLzqllbNk", ["6C6F63616C6462"])

# Open Session
session = api.openViewSession(
  api.getViewByName('Pubchem grid view')
)

# empty query to load all data into session
session.query()

# get values for some of the columns
result = session.getData(['Mol weight', 'Structure', 'CdId', 'Acceptors'])
print(result)
Save the script above as example.py and run it from command prompt. If the connect_API is installed correctly, the script returns the expected results.
More examples can be found in the examples directory, which is a part of the connect_API content.
Standalone Using Jupyter Notebook
Visit Plexus Connect Supports Jupyter Notebook for detailed guide with practical Examples of Usage.
Requirements
- Python Installation on local system. Version 3.7 or higher
- Connect API extension for local Python
- To install Jupyter using Anaconda and conda, follow the instructions provided here.
Jupyter Notebook can also be installed directly from command prompt usingpip3 install jupytercommand.
For more details visit the Jupyter webpage here.
From Connect frontend
Requirements
- Python Installation on server with Connect. Version 3.7 or higher
- Connect API extension for Python on server
For using connect_API for scripting in Connect frontend, a subclass of ConnectScript needs to be created first. This lets you react on user input and modify frontend state.
ConnectScript is a Python script, which can be called by Connect frontend and can react on user actions like opening a view, clicking, querying or selection.
Example of a simple script:
class SimpleScript(ConnectScript):
  def onLoad(self):
     self.response.showMessage('Hello World')

  def onClick(self, payload):
    id = payload["id"] # = button id
    serverSchemaId = payload["serverSchemaId"] # = view id
    self.response.showMessage(f"Hello python")
    # plexusAPI response method, which triggers selection mode in Connect
    # and highlights clickable widgets and their fields for another click action
    # fieldIds = ids of fields, which will be highlighted in widgets bound to them
    self.response.setSelectableFieldsForScripting(["139E23801AC54F8EA71BFBFBD431CB89"])
    pass

  # Method listening for clicks to widgets previously highlighted by self.response.setSelectableFieldsForScripting
  def onWidgetClick(self, payload):
    # to open new browser window by Connect
    self.response.openNewWindow("http://chemaxon.com")

SimpleScript().execute()
Running script from Connect frontend
For usage from Connect frontend, a script needs to be saved in
- for UNIX
~/.chemaxon/plexus-suite/scripts-data/{schemaId}/ - for Windows
~/chemaxon/plexus-suite/scripts-data/{schemaId}/
and mapped to the view using ViewId in the scripts.conf file in the same directory. In order to map the script with specific view, open the scripts.conf, which is located together with the saved scripts in the scripts-data folder.
The script.conf file contains 3 variables which needs to be specified. The ViewId can be obtained from the address bar.
http://your_server.com/grid/6C6F63616C6462_213A0E201AB2EB5DA54552018904C869/1
In the address above, the view id begins immediately after the underscore and concludes just before the slash. The terms javascriptfile.js and pythonfile.py denote the names of the JavaScript and Python scripts you intend to use, respectively. As illustrated in the example below, semicolons separate the variables. To ensure the script operates correctly, it's important to input these variables in the specified sequence. Observe in the example that the Python script hello_world.py is in use, leaving the JavaScript file (javascriptfile.js) blank. However, it's crucial to include two consecutive semicolons to signify this absence.
 `view id;javascriptfile.js;pythonfile.py` </br>
 `213A0E201AB2EB5DA54552018904C869;;hello_world.py`
In the case when both JavaScript and Python scripts are specified in the script.conf file, Javascript will be given priority.
Directories in the scripting folder are automatically created during startup of the Connect server and named according to the deployed schemas. Each deployed schema belongs to a folder with the same name {Schema_ID}. Scripts are classified per schema and identified by Schema_ID.
More examples can be found in the examples directory, which is a part of the Connect API content.
Developing Connect frontend scripts locally
You can use DevelopmentConnectScriptContext to make the development loop shorter by running a frontend script locally without copying it to the server.
The basic workflow looks like this:
- open Connect in your browser and do any scriptable action, for example open a view or do a selection
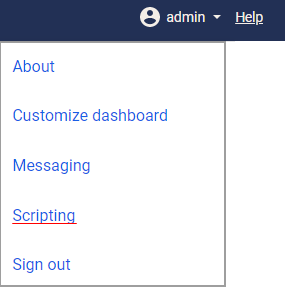
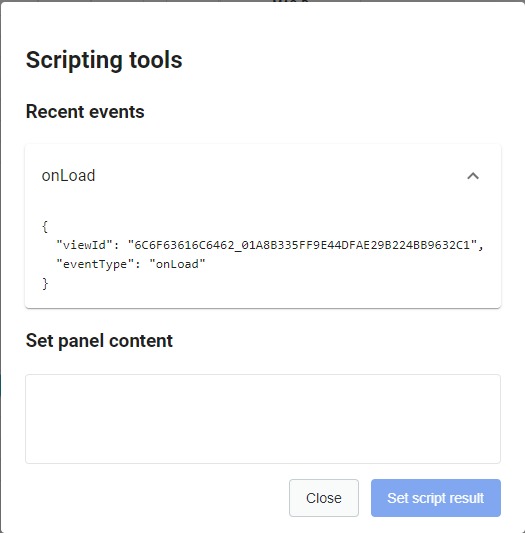
- use the scripting dialog available in the right top corner menu:
There are three action events available, as are shown in the table below:
| Script Action | Parameters | Description |
|---|---|---|
| onLoad | called when a view is loaded | |
| onSelectionChange | {selection: |
called when a selection is changed |
| onClick | {id: |
called after click on the button |
To copy a serialized frontend event you want to run locally:
- copy the current Connect URL and construct
DevelopmentConnectScriptContext - run your script using
DevelopmentConnectScriptContext - copy the result of your script run and use the scripting tools in Connect to display it on the scripting panel
- remove
DevelopmentConnectScriptContextand copy the finished script to the server
Example script:
#script example which you need to develop

class SimpleScript(ConnectScript):
  def onLoad(self):
     self.response.showMessage('Hello World')


     # connection part which returns #JSON for the one round of the loop
     # this part will be removed, when script developing is finished


SimpleScript().execute(DevelopmentConnectScriptContext(
  username="<USERNAME>",
  password="<PASSWORD>",
  connectUrl="http://your_server.com", # Connect backend location
  sessionUrl="http://your_server.com/grid/6C6F63616C6462_213A0E201AB2EB5DA54552018904C869/6", # URL to parse Session out of

     # Event to process - captured using Connect Frontend scripting tool dialogue
     # Event type "onLoad", "onSelectionChange", "onClick"

  event="""{
  "viewId": "6C6F63616C6462_213A0E201AB2EB5DA54552018904C869",
  "eventType": "onSelectionChange",
  "params": {
    "selection": [
      4
    ]
  }
}"""
))
Note, that username/password authentication is replaced with API key.
Installations
Installing Python version 3.7 or higher
Download Python version 3.7 or higher here and confirm that Python is properly installed. The simplest way to test for the existence of Python installation is to open the command prompt. Once the command prompt window opens, type python3 and press Enter. If you have Python installed correctly, you should see output similar to the following:
Python 3.12.0 (v3.12.0:0fb18b02c8, Oct  2 2023, 09:45:56) [Clang 13.0.0 (clang-1300.0.29.30)] on darwin
Type "help", "copyright", "credits" or "license" for more information.
    >>
If you receive a message like:
or
Python is either not installed correctly or the system variable path has not been set.
Setting up the system variable path
Instructions for setting up the system variable path on Windows can be found, for instance, at this link: How to Set Python Path on Windows.
For configuring the system variable path on Linux or Mac, navigate to your home directory and locate either the .bashrc file (Linux) or the bash_profile file (Mac) (usually at /Users/your-user-name/.bash_profile). Open this file in a text editor, insert the following lines, save your modifications, and then close the file.
Note, that * has to be replaced with the corresponding downloaded Python version, for example 3.11, 3.12, etc...
Once the system variable path is set, open the command prompt and type python3 (this applies to all operating systems). If the path was set properly, you should see the previously mentioned output.
Python 3.12.0 (v3.12.0:0fb18b02c8, Oct  2 2023, 09:45:56) [Clang 13.0.0 (clang-1300.0.29.30)] on darwin
Type "help", "copyright", "credits" or "license" for more information.
    >>
Type import sys to bring in the sys module, which is essential for running scripts.
With Python now set up, we can proceed with the installation of Connect_API.
Installing Connect API
The Python library for Connect scripting can be downloaded from the Chemaxon download pages with the appropriate Connect version. It can be found in the Additional Downloadables section here.
Note, that the Connect_API library of the same version as Connect is required to run Python scripts.
The Python library can be installed using the command pip install connect-api-*.tar.gz, where * represents the version number that needs to align with your Connect version.
Pip is the package installer for Python. Pip itself should be automatically included with Python, provided that Python was downloaded from the official website mentioned previously.
Running script from Connect frontend
In this example we will learn how to display an image in Plexus Connect using Python.
Let's start with running Plexus Connect, opening Form editor and adding Canvas Widget for Python scripting. So far, we have not applied any script and therefore you will see the following:
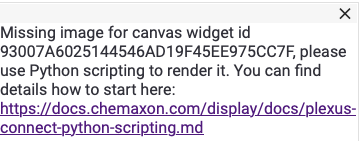
Let's do what is necessary to make the script working and to display an image.
Unzip the previously downloaded connect-api-*.tar.gz file, navigate to examples folder and open canvas-images.py file in text editor.
-
The canvas-images.py is a functional template script which can easily display any
jpgorpngimage. In order to display the image, Python requires a library calledpillowto be installed (see the 5th line in the scriptfrom PIL import Image). To install the pillow library, follow the same procedure as withConnect_APIlibrary. Thus, open the command prompt and enterpip install pillow. The library will be installed. -
Replace
SomeAbsolutePathToPngImagein thegivemejpgorgivemepngsegment of the script with a specific absolute path to the image you wish to display. The quotation marks stay in the script. Save the changes and close the script.
def givemepng(self, helper):
  img = Image.open("someAbsolutePathToPngImage", "r")
  img_byte_arr = io.BytesIO()
  img.save(img_byte_arr, format='PNG', subsampling=0, quality=100)
  return helper.getImageDataUrl('png', img_byte_arr.getbuffer().tobytes())
-
Save the script to the correct folder and modify the configuration file as described in Running a script from Connect frontend.
-
Run/reload the view on which the script is applied. You should see your image now.