Plexus Connect - Python Scripting
Python Scripting
This section will guide you step-by-step through a variety of ways to run Python scripts together with Plexus Connect application.
Before you start
- System requirements for setting up your environment are discussed in every section.
- Depending on the environment setup you will choose, the system requirements will be slightly different.
- Requirements and additional steps described in the installation section need also to be followed.
Usage and examples
Standalone
##### Requirements
- Python_installation on local system. Version 3.7 or higher
- Connect_API extension for local Python
Following basic workflow, when using connect_api in Python script is:
- Create
DataApi - Open
Session - Run query on new
Session - Fetch data for some of the fields
The simple example script below is written for Demo Project Pubchem Grid View :
Save the script above as example.py and run it from command prompt. If the connect_API is installed correctly, the script returns the expected results.
More examples can be found in the examples directory, which is a part of the connect_API content.
Standalone, using Jupyter Notebook
##### Requirements
- Python_installation on local system. Version 3.7 or higher
- Connect_API extension for local Python
- To install Jupyter using Anaconda and conda, follow the instructions provided here.
Jupyter Notebook can also be installed directly from command prompt using pip3 install jupyter command.
For more details visit the Jupyter webpage here.
- Example of usage: this demo example will guide you step-by-step through
Connect_APIfunctionalities used in Jupyter Notebook.
From Connect frontend
##### Requirements
- Python_installation on server with Connect. Version 3.7 or higher
- Connect_API extension for Python on server
For using connect_API for scripting in Connect frontend, a subclass of ConnectScript needs to be created first. This lets you react on user input and modify frontend state.
ConnectScript is a Python script, which can be called by Connect frontend and can react on user actions like opening a view, clicking, querying or selection.
Example of a simple script:
For usage from Connect frontend, this script needs to be saved in
- for UNIX
~/.chemaxon/plexus-suite/scripts-data/{schemaId}/ - for Windows
~/chemaxon/plexus-suite/scripts-data/{schemaId}/
and mapped to the view using ViewId in the scripts.conf file in the same directory.
Directories in the scripting folder are automatically created during startup of the Connect server and named according to the deployed schemas. Each deployed schema belongs to a folder with the same name {Schema_ID}. Scripts are classified per schema and identified by Schema_ID.
Content of the script.conf file:
view id;javascriptfile.js;pythonfile.py
213A0E201AB2EB5DA54552018904C869;;hello_world.py
The ViewId can be obtained from the address bar. When a view is opened in a browser, the Connect URL contains the ViewID as it is shown in the following URL example:
http://your_server.com/grid/6C6F63616C6462_213A0E201AB2EB5DA54552018904C869/1
More examples can be found in the examples directory, which is a part of the connect_API content.
Developing Connect frontend scripts locally
You can use DevelopmentConnectScriptContext to make the development loop shorter by running a frontend script locally without copying it to the server.
The basic workflow looks like this:
- open Connect in your browser and do any scriptable action, for example open a view or do a selection
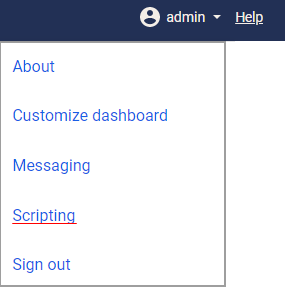
- use the scripting dialog available in the right top corner menu:
There are three action events available, as are shown in the table below:
| Script Action | Parameters | Description |
|---|---|---|
| onLoad | called when a view is loaded | |
| onSelectionChange | {selection: |
called when a selection is changed |
| onClick | {id: |
called after click on the button |
To copy a serialized frontend event you want to run locally:
- copy the current Connect URL and construct
DevelopmentConnectScriptContext - run your script using
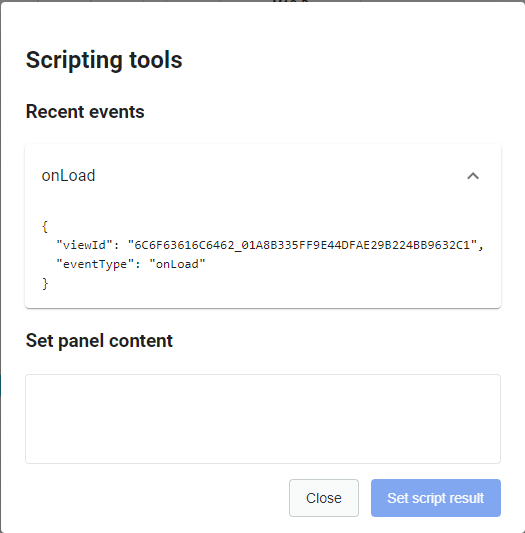
DevelopmentConnectScriptContext - copy the result of your script run and use the scripting tools in Connect to display it on the scripting panel
- remove
DevelopmentConnectScriptContextand copy the finished script to the server
Example script:
Installation
Install Python version 3.7 or higher
Confirm that Python is properly installed. The simplest way to test for the existence of Python installation is to open the command prompt. Once the command prompt window opens, type python and press Enter. If you have Python installed correctly, you should see output similar to the following:
If you receive a message like:
Python is either not installed correctly or the
system variable path has not been set.
Install Connect_API
The Python library for Connect scripting can be downloaded from the Chemaxon download pages with the appropriate Connect version. It can be found in the Additional Downloadables section here.
The Connect_API library of the same version as Connect is required to run Python scripts.
The Python library can be installed by using pip install connect-api-*.tar.gz, where * is the version number which must correspond to the Connect version.
Pip is the package installer for Python, pip itself is a package that someone might want to install, if it is not a part of Python.