IJC Plugin Quick Start
Overview
Welcome to Instant JChem plugin development!
Instant JChem (IJC) is an out-of-the-box tool that allows scientists to create, manage and analyse chemical structures and their data. It serves as a desktop application that provides a convenient and straight-forward approach to the analysis of chemical and biological data. IJC is a database-centric environment that supports query and sorting functionality, and handles large volumes of data (hundreds of thousands of structures).
IJC is extendable. As a customer or 3rd party developer, you can extend IJC and build higher level features on top of the core functionality. IJC provides much of the basic framework needed, as well as the hooks for extending it with new data types. No longer will the chemical spreadsheet need to be re-invented yet again. Instead, you are able to use the form builder, possibly with your own custom view widgets, without needing to worry about infrastructural details such as persistence, security, and import/export. Instead, you can extend IJC by adding any data types that might be specific to your needs and then build an application on top of these basic data types and tools.
This tutorial will guide you through the process of installing and setting up tools required for Instant JChem plugin development. It will also help you with building and running Instant JChem example plugins that you will download from Chemaxon's web site.
Instant JChem application itself is built on top of NetBeans Platform, which means that the application consists of many small modules (plugins) that each implement part of the application's functionality. All these plugins are bundled together alongside with NetBeans platform binaries in one application called Instant JChem.
Developing an Instant JChem plugin is simply a process of creating a new module and adding it to the existing Instant JChem application. In principle it is the same process as what IJC developers do to create Instant JChem application.
Contents:
Instant JChem installation
Since we are going to extend Instant JChem application in this tutorial by several example plugins that have been prepared in advance it comes with no surprise that we need to have Instant JChem application installed. If you have not done so, please install it now.
Instant JChem application can be downloaded from Chemaxon website's download area. Please download an installer appropriate for your operating system and follow its instructions.
NetBeans IDE installation
For developing IJC plugins you can use any Integrated Development Environment (IDE) that supports java development and Ant, however, since IJC plugins are essentially NetBeans modules the NetBeans IDE is best suited for the task. It's also what all IJC developers use for developing Instant JChem. We recommend to use NetBeans IDE unless you are a seasoned java practitioner skilled in using Ant.
NetBeans IDE can be downloaded from here. The version we used in this tutorial was NetBeans IDE 9.0. Please follow the NetBeans documentation to install the NetBeans IDE.
Downloading IJC plugin examples
Having both Instant JChem and NetBeans IDE installed the next thing we will need is the example plugins. Their sources in appropriate version is freely available for downloading from IJC download page. ijc-api-examples.zip contains both sources in sources folder and already built plugins as .nbm files in plugins folder.
Please donwload the ZIP file and extract its contents somewhere on your local harddisk. After unzipping the file you will have ijc-api-examples folder with subfolders plugins and sources containing built plugins and their sources.
Exploring IJC plugin examples in NetBeans IDE
The IJC plugin examples are organized in several plugins (or modules in NetBeans IDE terminology) that are all part of one module suite called api-examples-suite. We are now going to open this suite in NetBeans IDE.
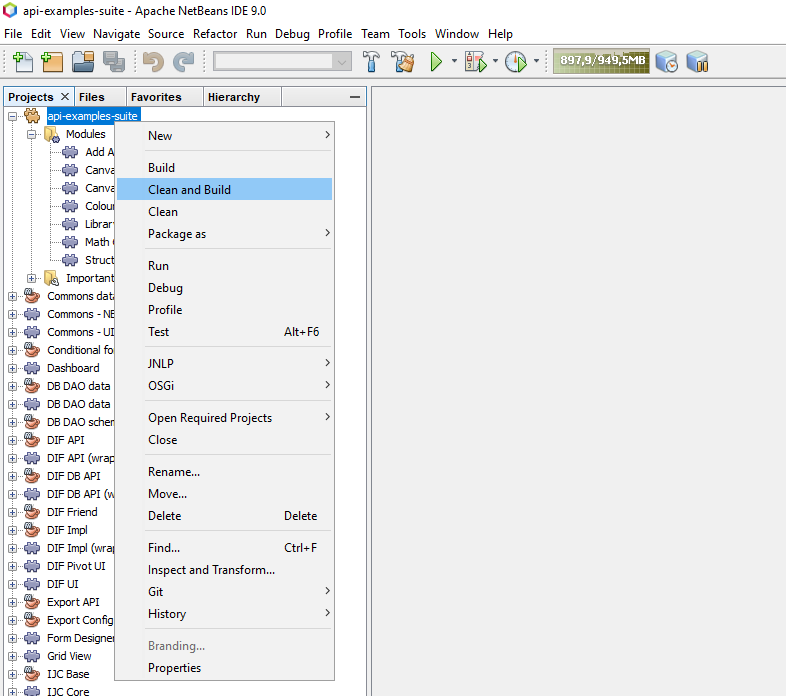
If you haven't done so, please start NetBeans IDE that you installed. When it starts go to its main menu File -> Open Project... and in the 'Open Project' dialog select the api-examples-suite folder under the ijc-api-examples/sources that you've unzipped in the previous step and press Open Project button.
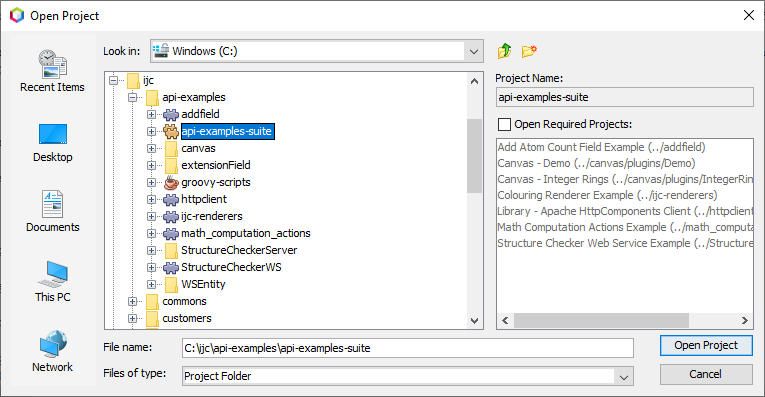
Open Project dialog - select api-examples-suite project and open it. When the api-examples-suite opens your IDE will look like the one on the following screenshot.
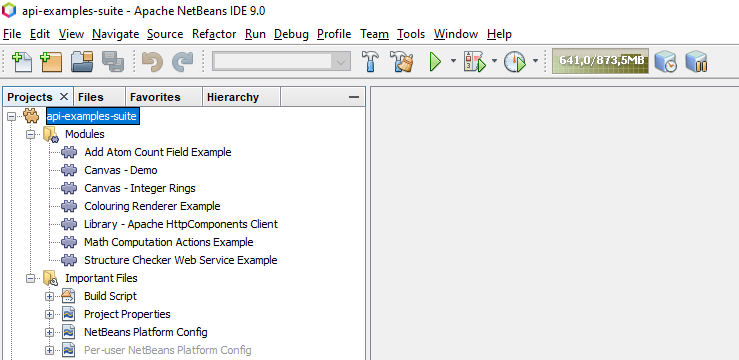
NetBeans IDE 9.0 with api-examples-suite project
Setting up NetBeans IDE
Since all IJC plugins that we develop will run as part of Instant JChem application, which we installed at the beginning of this tutorial. We will have to tell NetBeans IDE where our Instant JChem application is installed so that it could correctly compile and deploy our plugin projects.
In order to do that we will set up the Instant JChem application as a ' NetBeans Platform '. In general, any java application built on top of the original NetBeans Platform can be used as a basis for further development and as such can itself serve as another NetBeans Platform. Therefore the Instant JChem application that we installed at the beginning can be used as a new NetBeans Platform and can be extended by additional plugins.
Adding a new NetBeans Platform in the IDE is simple. Just go to the IDE's main menu Tools -> NetBeans Platforms and in the 'NetBeans Platform Manager' click the Add Platform... button. This will open a wizard that will guide you through the whole process.
In the first step select the folder where you installed your Instant JChem application. When selected you will be able to click Next button and proceed to the next step, where you can specify your new platform's name. Please call your platform IJC Platform in order to match the platform name used in the api-examples-suite project. Click Finish button to close the wizard and create the new NetBeans Platform. Close the NetBeans Platform Manager.
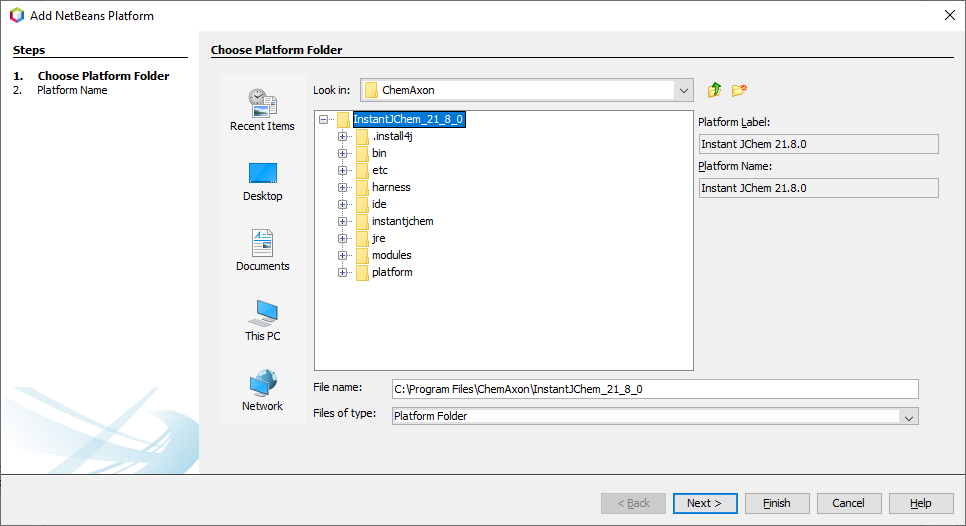
First step - select the folder where you installed Instant JChem application
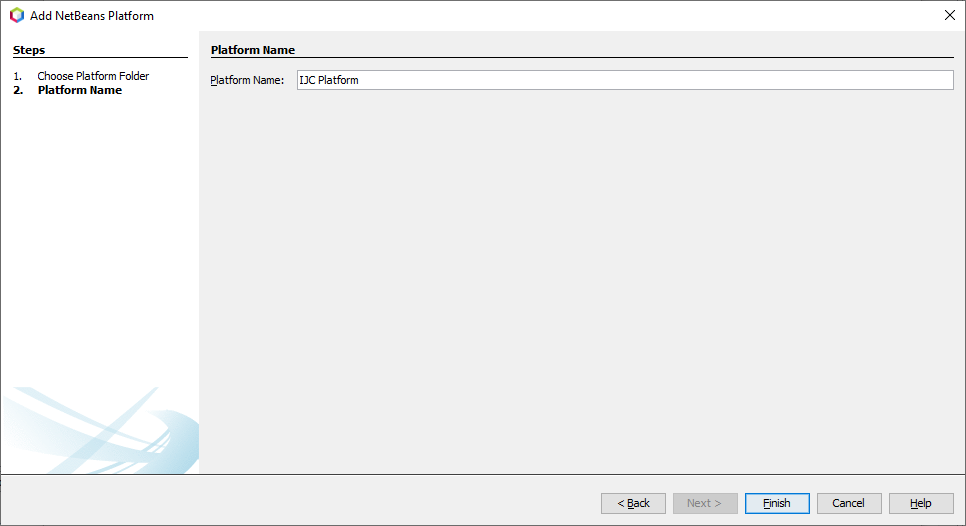
Second step - choose IJC Platform as a name for your NetBeans Platform
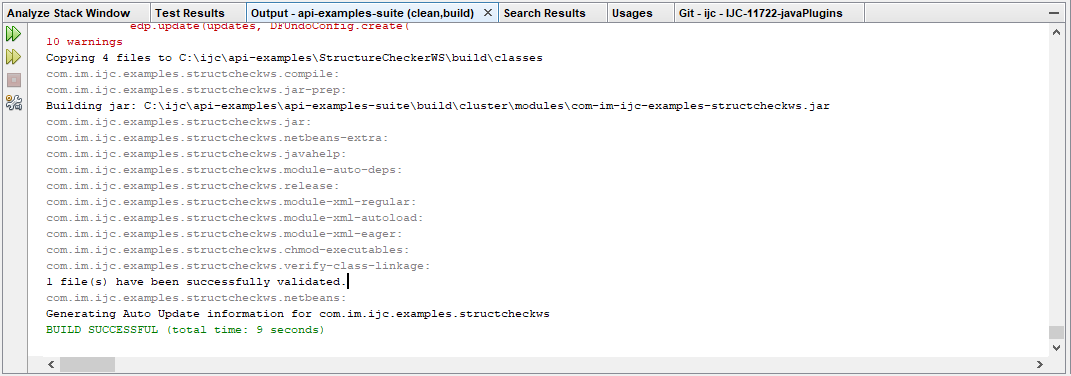
Now you should be able to build api-examples-suite in NetBeans IDE:
Right click on the suite - choose Clean and Build. Check Output window for green BUILD SUCCESSFUL message in the end:
Now you can open particular modules in the suite, experiment with its source code. You can also try to install pre-built '.nbm' plugins from the plugins folder. See NetBeans plugin development page for more.
Running the example plugins
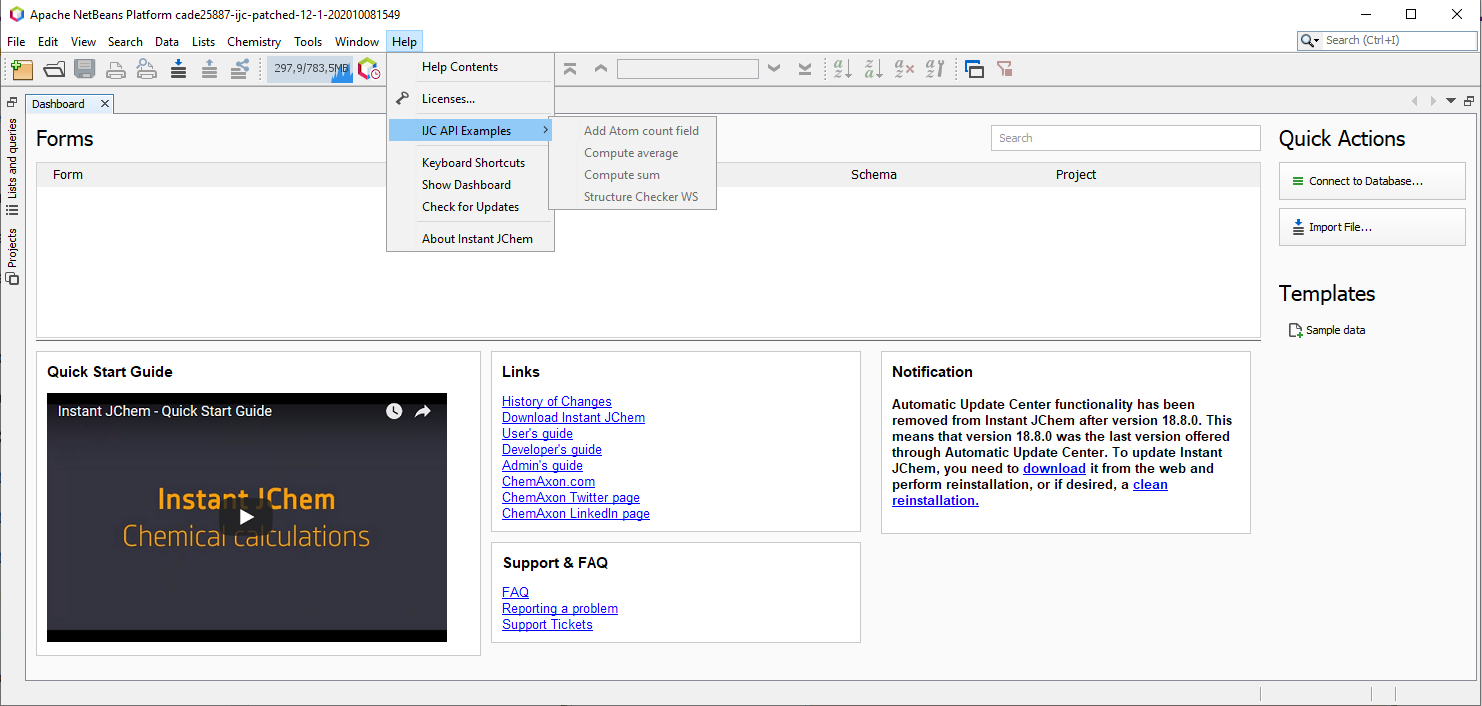
Finally, we are ready to run the IJC plugin examples. You can do so in 'Projects' explorer in NetBeans IDE by right clicking the api-examples-suite project node and choosing Run. Instant JChem application will start with the IJC example plugins available under the Help -> IJC API Examples menu:
Conclusion
Congratulations! You have done first steps towards becoming IJC plugin developer. In this tutorial you have learned:
-
What development tools you need for developing Instant JChem plugins
-
How to install NetBeans IDE 9.0
-
How add existing Instant JChem application as a NetBeans Platform in the NetBeans IDE
-
How to open and explore IJC example plugins suite
There are many more tutorials available for IJC plugin developers. Your next step should be tutorials focused on exploring the source code and functionality provided by IJC example plugins that you have successfully compiled and installed to your Instant JChem application today. See the list of available tutorials.